Let’s be real — clean water is one of those things you don’t really think about until you suddenly don’t have it. Maybe your pond water’s gone murky, your tap’s got a strange taste, or you’re deep into a weekend off-grid adventure and realize you forgot the fancy filter. Whatever the case, knowing how to make your own water filter can be more than just a cool survival skill — it can be a surprisingly satisfying home project.
But here’s the thing: most DIY water filter guides on the internet are either overly technical or way too simplistic (hello, upside-down soda bottle science experiment). This isn’t that. We’re aiming for that sweet spot: useful, doable, and effective — with a little backyard-engineer flair.
Why Go Homemade?
There’s a quiet charm in building something that works. It connects you back to the basics. It’s also incredibly useful — especially if you’re dealing with pond water for gardening, fishkeeping, or just hate the idea of unnecessary plastic cartridges.
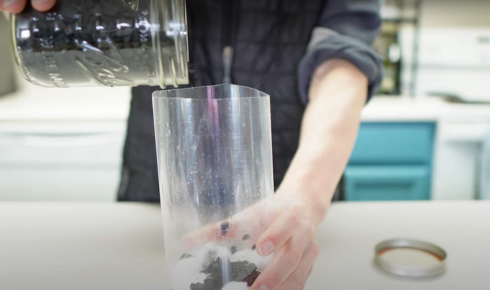
Enter the homemade charcoal pond filter. Simple. Powerful. Dirt cheap.
Charcoal (especially activated) is a natural filtration beast — it traps impurities, removes odors, and improves clarity. When used right, it can turn a greenish mess into a sparkling pond, helping maintain a healthy ecosystem for fish and plants alike. And bonus — it doesn’t require electricity or fancy tech.
But What If You Don’t Have Charcoal?
Fair question. Maybe you’re mid-project and realize you forgot to buy it, or maybe you just want a charcoal-free option for whatever reason (budget, availability, experimentation). That’s when you dive into a homemade water filter without charcoal — still effective, still DIY, just a bit different in its approach.
Instead of charcoal, you rely more on layered filtration. Think: gravel, sand, fine cloth, and even natural materials like banana peels (yep, they’ve got some filtering magic in them). These layers trap sediments, debris, and some impurities. No, it won’t purify water to lab standards — but for gardening, pre-filtering, or emergency use, it holds up surprisingly well.
Materials You’ll (Actually) Need
For both versions, you don’t need anything fancy. Here’s a combined basic list you can tweak depending on your setup:
- A plastic container (a bucket, water jug, or large bottle works)
- Fine gravel or pebbles
- Washed sand
- Activated charcoal (or skip this for the charcoal-free version)
- A cotton cloth or coffee filter
- Mesh screen (optional but helpful)
- A drill or something to poke holes
Feel free to upcycle materials — think old planters, soda bottles, or even PVC pipes. The idea is to build something modular, low-cost, and maintainable.
The Layering Secret
Here’s where the magic happens. If you’re doing the charcoal version, the order matters. From bottom to top:
- Coarse gravel – helps catch larger particles.
- Sand – filters finer silt and dirt.
- Charcoal – the heavy lifter that removes chemicals and odors.
- Cloth – optional top layer to prevent debris from clogging up the works.
For the charcoal-free version, just skip that layer and consider doubling up on sand or using fine mesh to improve filtration. It won’t remove chemicals as efficiently, but you’d be surprised how much clarity you’ll get.
Some folks even use natural additions like crushed brick, banana peel, or moringa seeds for added filtration — just do your homework first, especially if you’re drinking the water (pro tip: boil it after filtering if it’s for consumption).
Putting It All Together
Now that you’ve got your materials, it’s build time.
- Cut the bottom off your container if needed.
- Layer the materials from bottom to top.
- Secure the base with mesh or cloth so nothing falls out.
- Pour murky water into the top and let gravity do the rest.
If it trickles out too slow, widen the holes a bit or use coarser materials. If it gushes out too fast, add more fine sand to slow things down and improve clarity.
Maintenance? Just rinse out the top layers occasionally and replace the charcoal every few weeks if you’re using it. If it’s pond water, check for algae buildup — that’s your cue for a clean-up.
Why DIY Just Feels Better
There’s something deeply satisfying about building your own filter. It’s not just a diy homemade water filter project — it’s a reminder that we don’t always need store-bought solutions. Whether you’re a hobbyist fishkeeper, a camping enthusiast, or someone just tired of overpriced filtration cartridges, making your own puts you back in control.
And let’s be honest — once you see cloudy water turn clear because of something you built with your own hands, it’s hard not to feel a little proud.
Some Tips You’ll Be Glad to Know
- Activated charcoal > Regular BBQ charcoal. They’re not the same. If you’re using BBQ-style stuff, make sure it’s additive-free and crushed fine.
- Test your water. Even with good filtration, you can’t always see contaminants. For drinking, add boiling as a follow-up step, or use water test kits if you want peace of mind.
- Don’t overthink it. This doesn’t have to be perfect. The beauty of DIY is iteration. Make it. Test it. Improve it. That’s the fun part.
The Bigger Picture
We live in a world of filters — not just for water, but for air, information, and even relationships. And while most are invisible, the physical act of filtering something as basic as water can feel grounding. A small act of self-reliance. A quiet kind of power.
Maybe you’re building this filter for your backyard pond. Maybe it’s an experiment with your kids. Or maybe you’re prepping for a trip where clean water isn’t guaranteed. Whatever the reason, this small project connects you to something ancient — the universal human need for clean water, and the ingenuity to make it happen with whatever’s around.
And who knows? Maybe next time your neighbor complains about murky pond water, you’ll be the one with the solution — and a pretty cool story to go with it.
Final Thoughts
Clean water doesn’t have to come from a faucet, and clever solutions don’t have to come with a barcode. Whether you’re tackling a homemade charcoal pond filter, testing a homemade water filter without charcoal, or diving into your own diy homemade water filter project, you’re doing more than filtering water — you’re building something real, useful, and kind of brilliant.